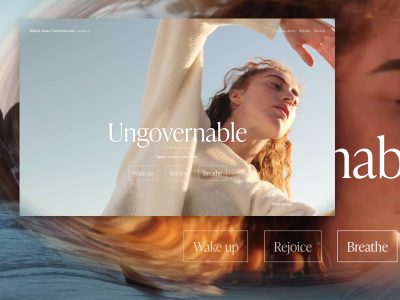
Mmm… swirly goodness…
Hey! Snap out of it! Ok. Now, in this tutorial we’re going to have some fun creating this pretty crazy little effect by tipping our toes into WebGL. The water is warm, I promise!
What’s OGL?
OGL is a WebGL library that is going to save us having to write a bunch of pretty unfriendly WebGL code directly. It has been my baby for the last year or so – I’ve been busy adding a bunch of examples to try and give people a kick-start with practical references.
By design, it’s tightly coupled to WebGL with only a small amount of abstraction – meaning it’s very lightweight. For example, the OGL classes required for this experiment are under 13kb gzipped – and more than half of them are just maths.
You got any more of them mouse trails?
Yes! Moving on, sorry.
Mouse trails (or any sort of trails) are just innately fun to interact with. The little touch of physics that it adds can really make an animation feel incredibly reactive and tangible, to the point where you can be certain that a good percentage of your users’ time will be spent playing with the effect, before consuming any of your site’s content… sorry not sorry.
Of course, they can be achieved using a whole range of techniques. Example time.
Starting with a really clever, recent one done using the DOM (html) and CSS. I especially love the difference-blend style they’ve added to the trail. The crux of the effect is a number of diminishing circles that follow one another, giving the effect of a tapered line.
Developed by Luca Mariotti. With the ink trail effect from Ricardo Mendieta.
Here’s an effective take on one, made using the 2D Canvas api. This one draws a circle at the head of each line every frame, while simultaneously the whole scene slowly disappears.
By Hakim El Hattab.
And here’s one used as a main game mechanic, made using SVG by yours truly – a few trips-around-the-sun ago… It’s a dynamic bezier curve whose start, middle and end positions are updated every frame.
So each of these previous (viable) options use drawing APIs (CSS, Canvas 2D, SVG) to render those pixels. WebGL, on the other hand, leaves all of that pixel-drawing math in your capable hands. This means two things.
Firstly, it’s more work for you. Yep, it’ll probably take you longer to get something up and running, working out those pesky projection matrices, while keeping an eye on the optimisation of your attribute buffers…
Buuut (important but), it’s less work for the computer – so it’ll run (normally, waaaay) faster. You’re basically cutting out the middle man. It also gives you a crazy amount of flexibility, which I highly appreciate.
The Approach
I’m a fan of visualising problems to understand them (let’s not talk about quaternions…), so let’s break it down.
We will start by making a number of points, made up of [x, y] coordinates, arranged in a lovely little line.

Then we’ll use these to generate a geometry, duplicating each point so that there are two vertices at each step along the curve. Why two? Just a sec.

Now, because our paired points are at the exact same position, our line is infinitely thin when rendered – and hence, invisible… No good. What we need to do is separate those pairs to give the line some width. And, puuuush.

And there we have our line mesh, all visible and line-y…
The part I nimbly skipped over there is also the most complicated – how do we know in which direction to move each vertex?
To solve this, we need to work out the direction between the previous and next points along the line. Then we can rotate it by 90 degrees, and we’re left with the angle we want: the normal.

Now that we have our normal, we can start getting a bit creative. For example, what if we separated the pairs differing amounts at each point? Here, if we make the pairs get closer together toward the ends of the line, it will give us this sharp, tapered effect.

Now see what fun ideas you can come up with! I’ll wait. A bit more. Ok, stop.
And that’s the most complicated part over. Note: I haven’t gone into the depths of each caveat that drawing lines can present, because, well, I don’t need to. But I couldn’t possibly write about lines without mentioning this extremely informative and digestible article, written by Matt DesLauriers about everything you’d want to know about drawing lines in WebGL.
Code time – setting the scene
To kick us off, let’s set up a basic OGL canvas.
Here’s an OGL CodeSandbox Template project that I’ll be using as a guide. Feel free to fork this for any OGL experiments!
First import the required modules. Normally, I would import from a local copy of OGL for the ability to tree-shake, but to keep the file structure empty on CodeSandbox, here we’re using jsdelivr – which gives us CDN access to the npm deployment.
import {
    Renderer, Camera, Orbit, Transform, Geometry, Vec3, Color, Polyline,
} from 'https://cdn.jsdelivr.net/npm/ogl@0.0.25/dist/ogl.mjs';
Create the WebGL context, and add the canvas to the DOM.
const renderer = new Renderer({dpr: 2});
const gl = renderer.gl;
document.body.appendChild(gl.canvas);
Create our camera and scene.
const camera = new Camera(gl);
camera.position.z = 3;

const controls = new Orbit(camera);

const scene = new Transform();
And then render the scene in an update loop. Obviously the scene is empty, so this will currently look very black.
function update(t) {
    requestAnimationFrame(update);
    controls.update();

    renderer.render({scene, camera});
}
But now we can do all of the things!
As an input to OGL’s Polyline class, we need to create a bunch of points (xyz coordinates).
Here, the x value goes from -1.5 and 1.5 along the line, while the y value moves in a sine pattern between -0.5 and 0.5.
const count = 100;
const points = [];
for (let i = 0; i < count; i++) {
    const x = (i / (count - 1) - 0.5) * 3;
    const y = Math.sin(i / 10.5) * 0.5;
    const z = 0;

    points.push(new Vec3(x, y, z));
};
Then we pass those points into a new instance of Polyline, along with colour and thickness variables (uniforms). And finally, attach it to the scene.
const polyline = new Polyline(gl, {
    points,
    uniforms: {
        uColor: {value: new Color('#1b1b1b')},
        uThickness: {value: 20},
    },
});

polyline.mesh.setParent(scene);
Here we have that working live. (Click and drag, scroll etc. If you want…)
How about a square? Let’s just change those points.
const points = [];
points.push(new Vec3( 0, -1, 0));
points.push(new Vec3(-1, -1, 0));
points.push(new Vec3(-1,  1, 0));
points.push(new Vec3( 1,  1, 0));
points.push(new Vec3( 1, -1, 0));
points.push(new Vec3( 0, -1, 0));
Circle?
const count = 100;
const points = [];
for (let i = 0; i < count; i++) {
    const angle = i / (count - 2) * Math.PI * 2;
    const x = Math.cos(angle);
    const y = Math.sin(angle);
    const z = 0;

    points.push(new Vec3(x, y, z));
};
You may have noticed that when you rotate or zoom the camera, the line will always stay the same thickness. You would probably expect the line to get thicker when it’s closer to to camera, and also to be paper thin when rotated on its side.
This is because the pair separation we spoke about earlier is happening after the camera’s projection is applied – when the vertex values are in what’s called ‘NDC Space’ (Normalized Device Coordinates). Projection matrices can be confusing, but luckily, NDC Space is not.
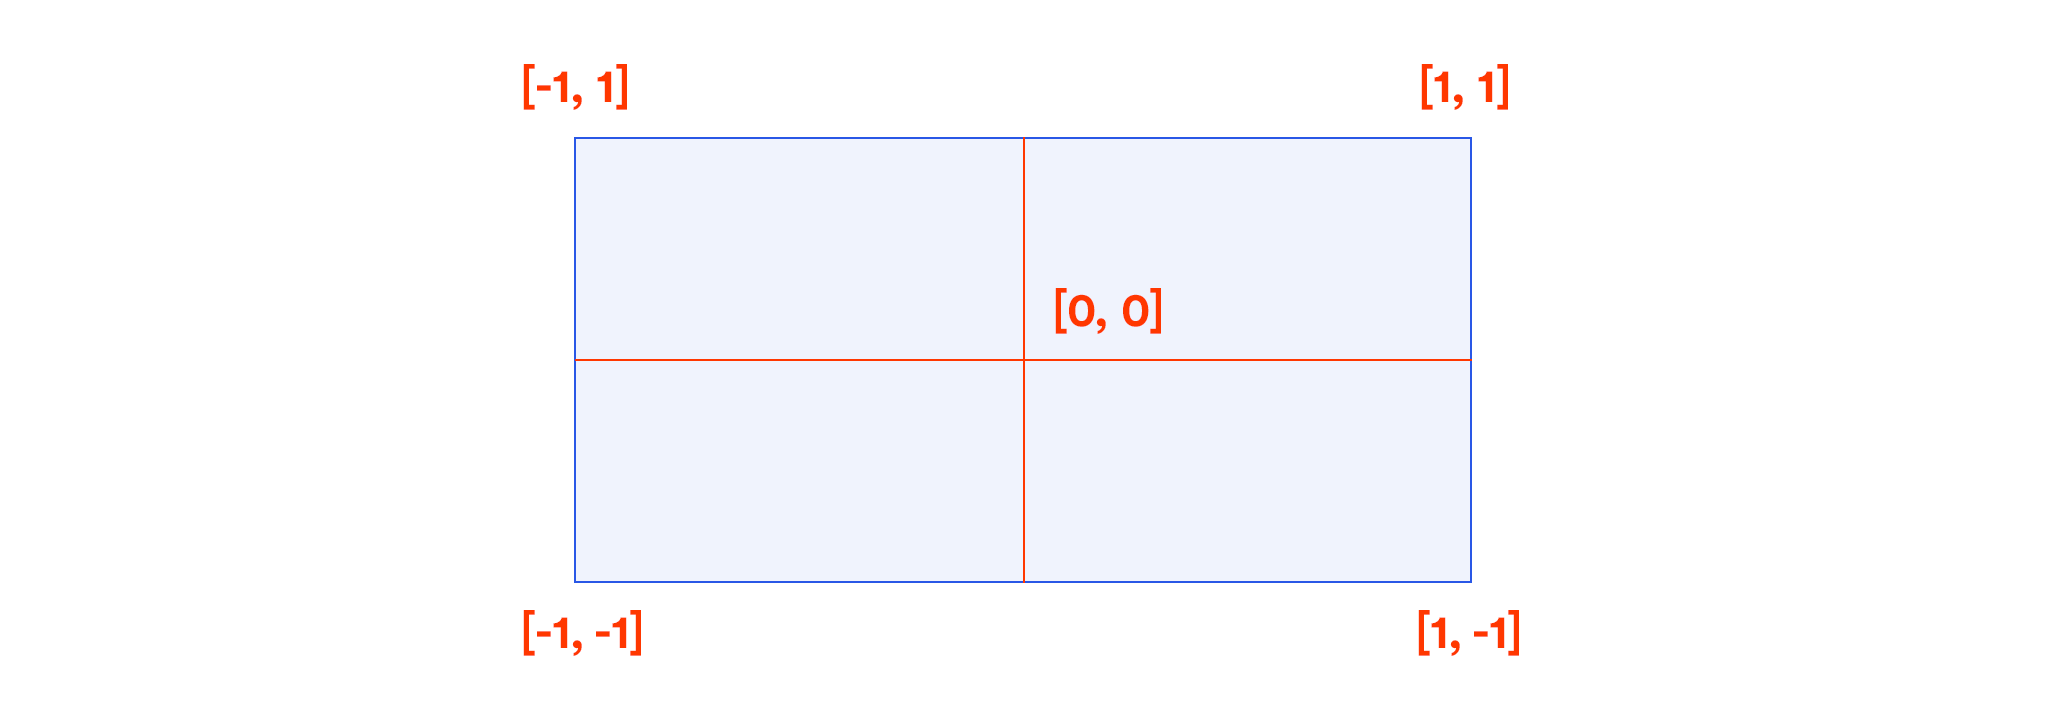
NDC Space is simply picturing your canvas as a 2D graph, with left to right (X), and bottom to top (Y) going from -1 to 1. No matter how complicated your scene is (geometry, projections, manipulations), each vertex will eventually need to be projected to a -1 to 1 range for X and Y.

A more common term you’ve probably heard is Screen Space, which is very similar, but instead of a -1 to 1 range, it’s mapped from 0 to 1.
We generally use cameras to help us convert our 3D coordinates into NDC Space, which is absolutely vital when you need to spin around an object, or view geometry from a specific perspective. But for what we’re doing (mouse trails. I haven’t forgotten), we don’t really need to do any of that! So, in fact, we’re going to skip that whole step, throw away the camera, and create our points directly in NDC Space (-1 to 1) from the get-go. This simplifies things, and it also means that we’re going to get the opportunity to write a custom shader! Let me show you.
Shaping the line with a custom shader
Firstly, let’s create our points in a straight line, with the X going from -0.5 to 0.5 and the Y left at 0. Keeping in mind that the screen goes from -1 to 1, this means we will end up with a horizontal line in the center of the screen, spanning half the width.
const count = 40;
const points = [];
for (let i = 0; i < count; i++) {
    const x = i / (count - 1) - 0.5;
    const y = 0;
    const z = 0;

    points.push(new Vec3(x, y, z));
};
This time when we create our Polyline, we are going to pass in a custom Vertex shader, which will override the default shader found in that class. We also don’t need a thickness just yet as we’ll be calculating that in the shader.
const polyline = new Polyline(gl, {
    points,
    vertex,
    uniforms: {
        uColor: {value: new Color('#1b1b1b')},
    },
});
Now, there are two shaders in the WebGL pipeline, Vertex and Fragment. To put it simply, the Vertex shader determines where on the screen to draw, and the Fragment shader determines what colour.
We can pass into a Vertex shader whatever data we want, that’s entirely up to you. However, it will always be expected to return a position on the viewport that should be rendered (in Clip Space, which, for this case, is the same as NDC Space; -1 to 1).
At the start of our Vertex shader, you will find the input data: Attributes and Uniforms. Attributes are per-vertex variables, whereas Uniforms are common variables for all of the vertices. For example, as this shader is run for each vertex passed in, the position Attribute value will change, moving along each point, however the uResolution Uniform value will remain the same throughout.
attribute vec3 position;
attribute vec3 next;
attribute vec3 prev;
attribute vec2 uv;
attribute float side;

uniform vec2 uResolution;
At the very end of our Vertex shader, you’ll find a function called main that defines the variable gl_Position. These two names are non-debatable! Our WebGL program will automatically look for the main function to run, and then it will pass the gl_Position variable on to the Fragment shader.
void main() {
    gl_Position = vec4(position, 1);
}
As our points are already in NDC Space, our shader – made up of just these two sections – is technically correct. However the only issue (the same as we had in our breakdown) is that the position pairs are on top of each other, so our line would be invisibly thin.
So instead of passing our position right on through to the output, let’s add a function, getPosition, to push each vertex apart and give our line some width.
vec4 getPosition() {
    vec2 aspect = vec2(uResolution.x / uResolution.y, 1);
    vec2 nextScreen = next.xy * aspect;
    vec2 prevScreen = prev.xy * aspect;

    vec2 tangent = normalize(nextScreen - prevScreen);
    vec2 normal = vec2(-tangent.y, tangent.x);
    normal /= aspect;
    normal *= 0.1;

    vec4 current = vec4(position, 1);
    current.xy -= normal * side;
    return current;
}

void main() {
    gl_Position = getPosition();
}
Ah, now we can see our line. Mmmm, very modernist.
This new function is doing the exact steps in our approach overview. See here.
We determine the direction from the previous to the next point.
vec2 tangent = normalize(nextScreen - prevScreen);
Then rotate it 90 degrees to find the normal.
vec2 normal = vec2(-tangent.y, tangent.x);
Then we push our vertices apart along the normal. The side variable has a value of -1 or 1 for each side of a pair.
current.xy -= normal * side;
“OK OK… but you skipped a few lines”.
Indeed. So, the lines that determine and apply the aspect ratio are there to account for the rectangular viewport. Multiplying against the aspect ratio makes our scene square. Then we can perform the rotation without risk of skewing. And after, we divide by the aspect to bring us back to the correct ratio.
And the other line…
normal *= 0.1;
Yes that one… is where we can have some fun. As this manipulates the line’s width.
Without this bit of code, our line would cover the entire height of the viewport. Why? See if you can guess…
You see, as the normal is a ‘normalised’ direction, this means it has a length of 1. As we know, the NDC Space goes from -1 to 1, so if our line is in the middle of the screen, and each side of the line is pushed out by 1, that will cover the entire range of -1 to 1. So multiplying by 0.1 instead only makes our line cover 10% of the viewport.
Now if we were to change this line, to say…
normal *= uv.y * 0.2;
We get this expanding, triangular shape.

This is because the variable uv.y goes from 0 to 1 along the length of the line. So we can use this to affect the shape in a bunch of different ways.
Like, we can wrap that code in a pow function.
normal *= pow(uv.y, 2.0) * 0.2;

Hm, how exponentially curvy. No, I want something more edgy.
normal *= abs(fract(uv.y * 2.0) - 0.5) * 0.4;

Too edgy…
normal *= cos(uv.y * 12.56) * 0.1 + 0.2;

Too flabby.
normal *= (1.0 - abs(uv.y - 0.5) * 2.0) * 0.2;

Almost… but a little too diamond-y.
normal *= (1.0 - pow(abs(uv.y - 0.5) * 2.0, 2.0)) * 0.2;

That’s not bad. Let’s run with that.
So now we have our shape, let’s deal with the movement.
Adding movement
To start off we just need 20 points, left at the default [0, 0, 0] value.
Then we need a new Vec3 that will track the mouse input, and covert the X and Y values to a -1 to 1 range, with the Y flipped.
const mouse = new Vec3();

function updateMouse(e) {
    mouse.set(
        (e.x / gl.renderer.width) * 2 - 1,
        (e.y / gl.renderer.height) * -2 + 1,
        0
    );
}
Then in our update function, we can use this mouse value to move our points.
Every frame, we loop through each of our points. For the first point, we ease it to the mouse value. For every other point, we ease it to the previous point in the line. This creates a trail effect, that grows and shrinks as the user moves the mouse faster and slower.
requestAnimationFrame(update);
function update(t) {
    requestAnimationFrame(update);

    for (let i = points.length - 1; i >= 0; i--) {
        if (!i) {
            points[i].lerp(mouse, 0.9);
        } else {
            points[i].lerp(points[i - 1], 0.9);
        }
    }
    polyline.updateGeometry();

    renderer.render({scene});
}
Have a play with it below.
We can make this a bit more fun by replacing the first point’s linear easing with a spring.
const spring = 0.06;
const friction = 0.85;
const mouseVelocity = new Vec3();
const tmp = new Vec3();

requestAnimationFrame(update);
function update(t) {
    requestAnimationFrame(update);

    for (let i = points.length - 1; i >= 0; i--) {
        if (!i) {
            tmp.copy(mouse).sub(points[i]).multiply(spring);
            mouseVelocity.add(tmp).multiply(friction);
            points[i].add(mouseVelocity);
        } else {
            points[i].lerp(points[i - 1], 0.9);
        }
    }
    polyline.updateGeometry();

    renderer.render({scene});
}
The extra bit of physics just makes it that much more interesting to play with. I can’t help but try and make a beautiful curving motion with the mouse…
Finally, one line is never enough. And what’s with all of this dark grey?! Give me 5 coloured lines, with randomised spring values, and we’ll call it even.
And there we have it!
As we’re using random values, every time you refresh, the effect will behave a little differently.
End
Thank you so much for sticking with me. That ended up being a lot more in-depth than I had planned… I implore you to play around with the code, maybe try randomising the number of points in each line… or changing the shape of the curve over time!
If you’re new to WebGL, I hope this made the world of buffer attributes and shaders a little less overwhelming – it can be really rewarding to come up with something interesting and unique.


This is awesome! Is there a way to replicate mix-blend-mode: difference using this method?
This is very detailed tutorial. I have fun to explore and play with it!! Thank you!
I’m probably stupid but… is there any way to make the background transparent? Changing the alpha value of the clearColor doesn’t seem to have any effect 🙁